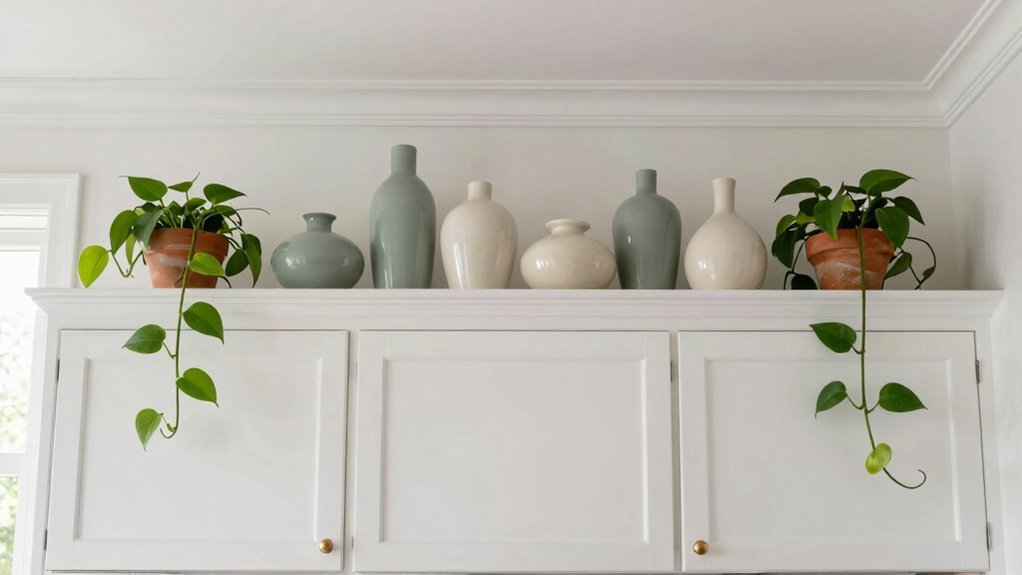
You’ve got that awkward gap above your kitchen cabinets, and you’re not sure what belongs there. It’s easy to ignore it, but that space can pull your whole kitchen together—or make it feel unfinished. The trick isn’t buying more stuff; it’s knowing how to arrange what you already have. There’s one mistake almost everyone makes, and it completely changes how the room feels.
Key Takeaways
- Use items you already own—vintage cake stands, ceramic pitchers, and old books create instant dimension without spending money.
- Choose heat-tolerant plants like snake plants or pothos in lightweight containers to soften hard edges and add life.
- Install battery-powered LEDs, puck lights, or plug-in rope lights to illuminate displays without any rewiring needed.
- Arrange items in odd numbers with tall pieces behind smaller ones, keeping a unified color palette and breathing room.
- Lay out groupings on the floor first, measure twice for clearance, and verify cabinet support before placing heavy objects.
Recommended Products
Press Control, Easy Operation: Just press the center lens of the LED push light to turn it on and emit soft light. Press it again to turn off the light. Very suitable for the elderly and children, even some pets can use it easily
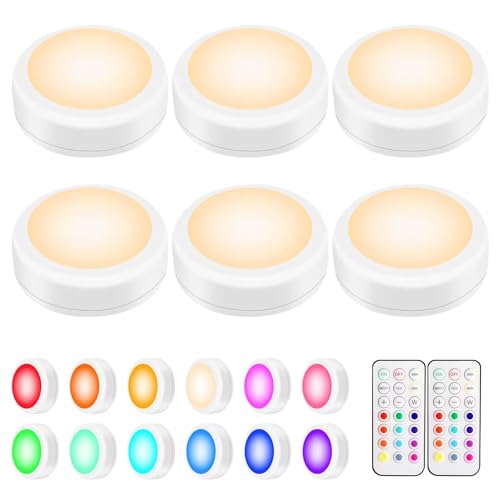
WIRELESS REMOTE- 6 LED puck lights with 2 remote controls. Turn the puck light ON/OFF with the remote or the tap lens. Remote can control all RGB lights at up to 20 feet distance. No hassle to control the battery lights even in hardly reached places.

【BRIGHT PUSH LIGHTS】 The compact tap light uses the latest LED light technology, unparalleled brightness that gives you up to 50 lumens of lighting, and the push lights use a new reflector to provide a larger lighting range. They are ideal under cabinet lights for kitchen or closet, no power cords, drilling holes, screws are required, the light is stable and non-flickering, and there is no hidden danger
Decorate Above Your Kitchen Cabinets With Items You Already Own
Why spend a fortune when you’ve already got everything you need? Look around your home. You’ll find treasures hiding in plain sight.
Grab those vintage cake stands collecting dust. Stack them at varying heights. You’ve created instant dimension. That ceramic pitcher from your grandmother? It belongs up there. Fill it with wooden spoons or let it stand alone.
Pull out books with worn spines. Lean them against the wall. Top them with small bowls you’ve forgotten. You’ve built layers without buying a thing.
Scour your garage for old crates. Turn them on their sides. Now you’ve got rustic shelving.
Mix metals you’ve accumulated. Copper, brass, silver—they all play together. You’ve curated, not decorated. Your kitchen tells your story. You’ve spent nothing. You’ve gained everything.
Recommended Products
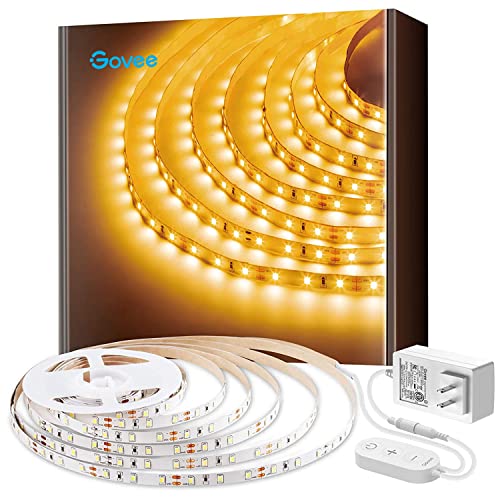
Warm White LED: With 300 LEDs and a 3000K color temperature, you'll enjoy an incredibly warm and bright illumination with improved color quality. Light up those dark rooms, cabinets and any corners with ease.
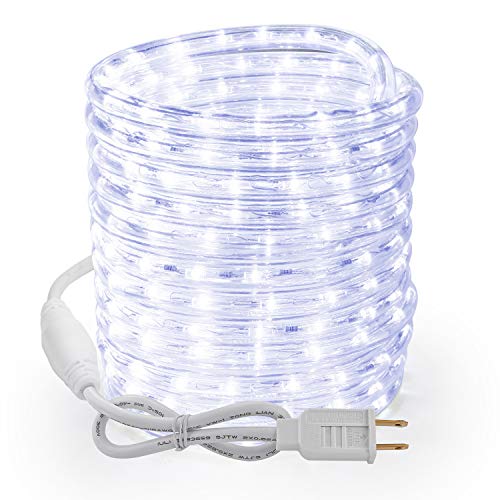
Super Brightness: Brighter than traditional incandescent lights, create a bright and relaxed atmosphere for your celebratory occasions with this daylight white flexible rope lights

FLEXIBLE ROPE LIGHTING — Bendable LED rope light delivers versatile indoor and outdoor accent lighting for patios, landscapes, decks, balconies and interior spaces
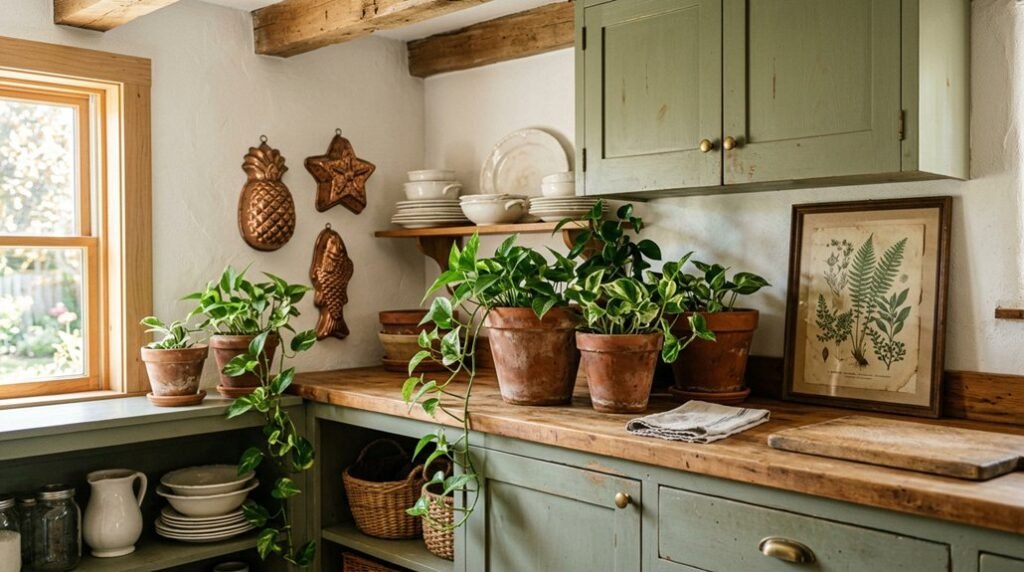
Add Plants That Survive the Heat and Height
If you’ve ever watched a fern wilt on a radiator, you know heat rises with a vengeance above kitchen cabinets. You’ll need plants that laugh at dry, hot conditions. Snake plants handle neglect and heat without complaint. Pothos trails beautifully and forgives missed waterings. ZZ plants thrive in neglect and warmth. You’ll want to avoid anything fussy like calatheas or ferns.
Place plants in lightweight containers you can easily lower for watering. Use decorative pots with drainage trays to protect your cabinets. Group varying heights for visual interest—tall snake plants anchor corners while trailing pothos softens edges. You’ll create a living, breathing display that filters kitchen air and adds organic texture. Check soil moisture weekly, but don’t overwater. These survivors prefer drought to drowning.
Recommended Products

Upgraded Motion Sensor Under Cabinet Lights: Setting the under cabinet lights on motion sensor mode, they auto-on when human motion is detected within 120°and 10ft in a dark or low light environment, and auto-off after about 20 seconds of no motion detected. No longer have to worry about tripping on the step in the dark trying to turn on the switch

Manual Control Design – No Motion Sensor: This RGB under cabinet light is designed for remote and button control only. It does not include a motion sensing feature. Simply turn it on/off and adjust colors and brightness using the remote or manual switch for precise lighting control without unexpected activation

Upgraded Motion Sensor Under Cabinet Lights: Setting the under cabinet lights on motion sensor mode, they auto-on when human motion is detected within 120°and 10ft in a dark or low light environment, and auto-off after about 20 seconds of no motion detected. No longer have to worry about tripping on the step in the dark trying to turn on the switch
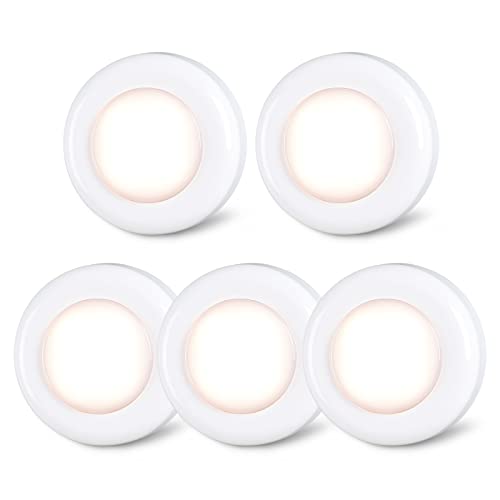
Install Lighting Without Rewiring Your Kitchen
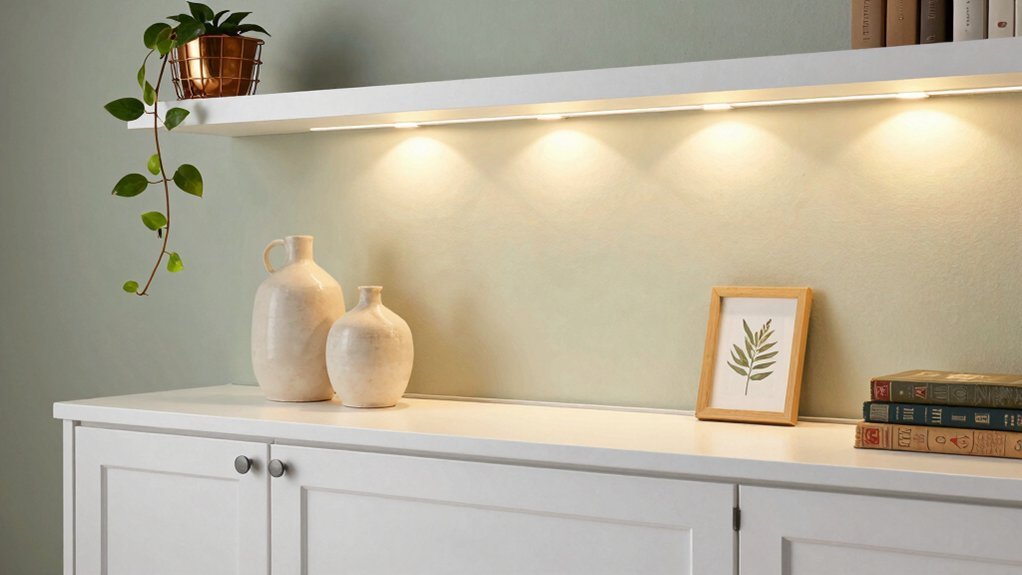
Since you can’t tear into drywall, you’ll rely on battery-powered and plug-in options that mount directly to cabinet tops or undersides. You’ll find rechargeable LED strips with adhesive backing that stick cleanly beneath upper cabinets, casting warm glows upward onto your display. You’ll position puck lights with remote controls to spotlight specific pieces you’ve arranged above. You’ll weave plug-in rope lights behind crown molding for subtle ambient effects. You’ll hide battery packs behind decorative items so nothing shows. You’ll set timers so lights activate automatically each evening. You’ll choose motion sensors for hands-free convenience when you enter the kitchen. You’ll measure carefully before buying, ensuring cords reach outlets without stretching visibly. You’ll secure loose wires with cable clips painted to match your cabinets. You’ll transform dark, forgotten spaces into illuminated showcases without ever touching a wire cutter.
Recommended Products

Pink Snake Design: this pink snake plant pot hugger features a playful climbing snake decor style that wraps gracefully around the edge of flower pots, and it adds a whimsical touch to your indoor or outdoor garden display, making it a delightful plant decorations for pots accent

【Artistic Colors & Van Gogh-Inspired Design】Immerse your space in the mesmerizing beauty of Van Gogh-inspired floral and starry night motifs with these decorative plant pots. Each boho plant pot showcases vibrant swirls of deep blues, golden yellows, and dreamy whites, transforming ordinary greenery into a gallery-worthy display. Perfect for flower pots outdoor or indoor settings, these hand-painted masterpieces blend artistic elegance with nature, making them standout cute planters for indoor plants or garden accents.

【Amazing Design】 The plastic planter pots design with water ripple appearance, complemented by a variety of vibrant color options, it is both artistic and perfectly matches any living room, bedroom, or outdoor decor, making plants appear closer to nature (Note: Plants Not Included)
Arrange Everything So It Looks Intentional, Not Random
How do you turn a jumble of objects into a cohesive display? You start by grouping items in odd numbers—threes and fives feel natural to the eye. You place taller pieces toward the back and layer smaller ones in front, creating depth without blocking sightlines. You stick to a unified color palette, mixing materials like wood, ceramic, and metal while keeping tones harmonious.
You repeat shapes or textures across the arrangement so pieces talk to each other. You leave breathing room between clusters—crowding screams clutter. You step back frequently, assessing balance from across the room.
You angle one item slightly, letting it break the line just enough to feel alive. You edit ruthlessly, removing anything that competes. You’re aiming for a collection that looks curated, not accumulated.
Recommended Products

Self Watering Pot: Cotton rope in the tall self watering planter for indoor plants absorb water from bottom and keep the soil moist. Plant wick pots store water can feed plants for two weeks or more. It makes your travel or business trip an big ease! Plants Not Included!
Skip the Mistakes That Make the Space Look Cheap
So what’s the real difference between a display that looks polished and one that screams bargain-bin? You’re avoiding clutter. Crowding every inch with too many small items creates visual chaos. You’re also passing on fake plants with visible dust, faded plastic fruit, and dollar-store signage that cheapens everything nearby.
You lose the “lived-in” look when you don’t edit. You leave price stickers showing, mismatch frames, or lean artwork that tilts awkwardly. You ignore scale and line up identical tiny objects in rigid rows—that reads craft-fair, not curated.
You’re ditching anything visibly damaged, yellowed, or dated. You’re not treating that shelf as storage overflow. You’re stepping back and spotting the weak links before anyone else does. Small corrections transform your space from amateur to intentional fast.
Recommended Products

Soft White LED – 50 lumens per light provide reliable source of light

Convenient Installation and Long-Lasting Battery Life: Requires no tools—just peel and stick with strong 3M adhesive for a quick, hassle-free setup. These battery puck lights are powered by 12 included reliable, eco-friendly AA batteries, delivering 1.8x longer life than standard lights while saving energy and reducing hassle. Battery-powered and wire-free, keeping kitchens, bookshelves, and pantries clutter-free.

UNDER CABINET, CLOSET AND TASK LIGHTING — Includes four light pucks with 20 lumens each that provide bright white LED light for cabinets, closets, pantries, laundry rooms, garages and workspaces
Refresh Your Display for Under $50
A few strategic swaps can transform that dusty ledge without draining your wallet.
Hit thrift stores for vintage crates, wire baskets, or ceramic pitchers. You’ll spend five to fifteen dollars per piece and gain instant character. Spray paint transforms mismatched finds into a cohesive collection for under ten dollars.
Swap out tired silk plants for dried pampas grass or wheat stalks from the craft store. You’ll create height and texture without the dust-collecting fuss.
Print free botanical illustrations and frame them in dollar-store frames. Group three above your cabinets for a gallery effect that costs less than lunch.
Rotate items you already own—mason jars, wooden cutting boards, stacked cookbooks. You’ll refresh the space using what’s hiding in your pantry or garage, proving style doesn’t require a splurge.
Recommended Products

Upgraded Motion Activated Led Lights Strip: The led tape light length extends to 16.4ft. And its motion activated box design is in line with ergonomics better to be used more comfortable, and its sensing range will extend to 19.68ft to be more sensitive

💡Great Brightness-- Very bright nicely diffused light, no led dots of light showing on your countertops, the light bar has 33LEDs, covering a wide range. The color is best for detailed work and kitchen cooking.

【Uniform Luminescence, Plug & Play】AC 110-130V Input, High Density 288 LEDs/M, Total 576 LEDs/2M, 8W/M.6.56FT cold white led strip light plug with switch, plug and play, onvenient for you to use. Compared with low voltage LED strips, high voltage LED strips will not show brightness difference in the whole strip, which is ideal for super bright decorative lighting suitable for home.Please note: When testing or using the light strip, be sure to fully extend it!
Measure Twice: A Quick Planning Checklist

Before you drag a single basket up that ladder, where exactly will each piece sit—and will it even fit?
Grab your tape measure and jot down the length, depth, and height of that awkward space above your cabinets. You’ll want at least six inches of clearance between the cabinet top and your ceiling, preferably more.
Now measure your intended items. That vintage crate might overwhelm a shallow ledge; that tall vase could scrape the ceiling. Lay everything out on your floor first, creating groupings with varying heights. You’ll avoid lopsided clusters and costly mistakes.
Sketch your arrangement or snap a photo for reference. Check sight lines from multiple angles—what looks balanced head-on might skew from the doorway. Finally, weigh your heaviest pieces. Can those brackets support your ironstone collection? Double-check everything.
Recommended Products

Upgraded Motion Sensor Under Cabinet Lights: Setting the under cabinet lights on motion sensor mode, they auto-on when human motion is detected within 120°and 10ft in a dark or low light environment, and auto-off after about 20 seconds of no motion detected. No longer have to worry about tripping on the step in the dark trying to turn on the switch

【Long-Lasting Battery & USB Charging】Experience uninterrupted illumination with our LED under cabinet lighting, featuring a 2200mAh high-capacity rechargeable battery. In "always on" mode, it can work at maximum brightness for 10 hours. Switch to automatic sensor mode for continuous operation lasting 40-60 days. With USB-C charging, enjoy faster charging times, fully replenishing the battery in just 2 hours (2 USB-C cables included).

Upgraded Motion Sensor Under Cabinet Lights: Setting the under cabinet lights on motion sensor mode, they auto-on when human motion is detected within 120°and 10ft in a dark or low light environment, and auto-off after about 20 seconds of no motion detected. No longer have to worry about tripping on the step in the dark trying to turn on the switch
Conclusion
You’ve now got everything you need to transform that awkward space above your cabinets. Mix your vintage finds with greenery and subtle lighting, keep your groupings intentional, and don’t overthink the editing process. Your kitchen’s upper reaches are prime real estate for personality—so grab what you already own, follow the checklist, and start stacking. A stunning display is closer (and cheaper) than you’d think.
Recommended Products

【COMBINATION SETS IN DIFFERENT SIZES】The ceramic flower pots have three different sizes. They are suitable for growing most kinds of family/office, plants in both small and medium size, such as orchids, Iilies, bamboo, african violets, snake plants, peppermint plants, cactus, aloe and succulent plants.
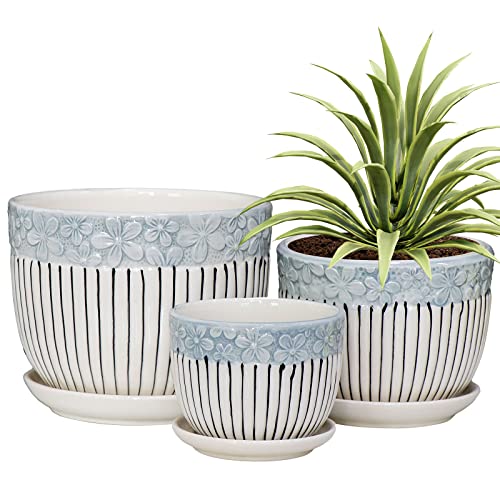
VERSATILE 3-POT SET - Includes large (6.7"D X 5.5"H), medium (5.5"D X 4.2"H), and small (4.2"D X 3.3"H) pots to fit all common houseplants, such as succulents, cactus, aloe, orchids, african violets, snake plants, herbs, pothos, and lilies.

【Unique Design】-Whiskey barrel planters with rustic touch,Imitation wine barrel planter design of retro style to but also reflects the texture of the whiskey barrel planters,so that you can feel the quiet rural comfort when garden or front yard planting.