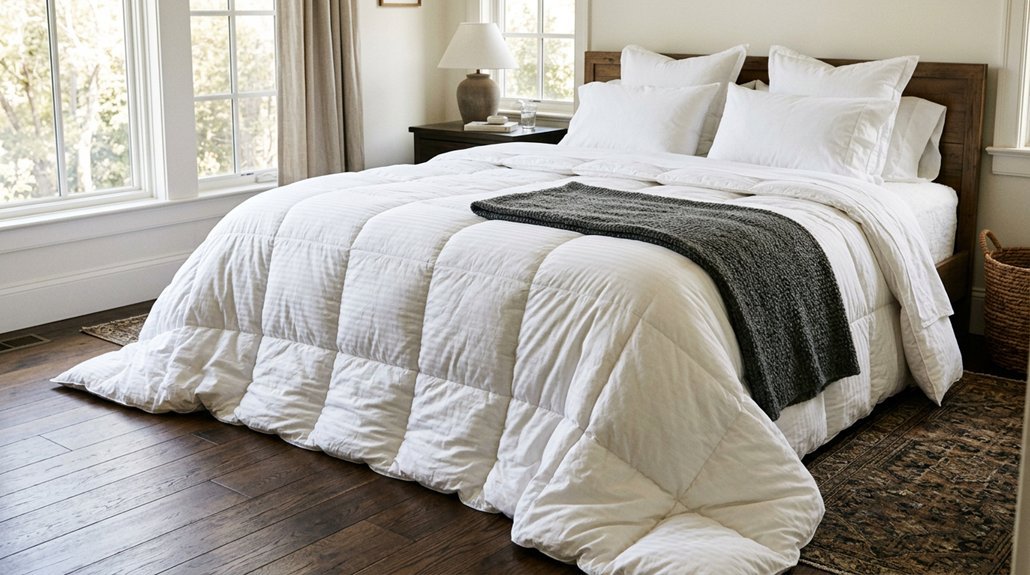
You’ve cleared your schedule and stood before those bare walls, ready to transform your space. Peel-and-stick wallpaper promises a stunning result without the mess of traditional paste, but the difference between a professional finish and a frustrating redo lies entirely in your approach. Let’s walk through the steps that’ll make your installation smooth, seamless, and something you’ll be proud to show off.
Prep Your Walls for Peel-and-Stick Wallpaper
Where should you begin before transforming your space? You start by ensuring your canvas is worthy of the vision ahead. To successfully prep walls for peel and stick wallpaper, you must create a smooth surface that welcomes every inch of your design. You clean meticulously, banishing dust, grease, and residue that sabotage adhesion. You dry the area completely, knowing moisture destroys the bond before it begins. If you’ve recently painted, you exercise patience—four weeks of curing transforms fresh paint into a receptive foundation. You address imperfections, sanding away texture that would telegraph through your pattern. You test an inconspicuous corner first, confirming your surface welcomes this transformation. When you respect these preparations, you’re not merely decorating—you’re establishing the groundwork for enduring elegance.
Recommended Products

【Set of basic tools】: Package includes craft art knife with 5 replaceable blades, red smoother, blue smoother with soft felt, measuring tape

VESATILE WALLPAPER APPLICATION TOOL KIT: A basic tool kit help you on all types of wallpaper application, trimming ceiling, woodwork or baseboard projects, vinyl wrap, window tint or glass film installation, makes the installation process much easier for you.
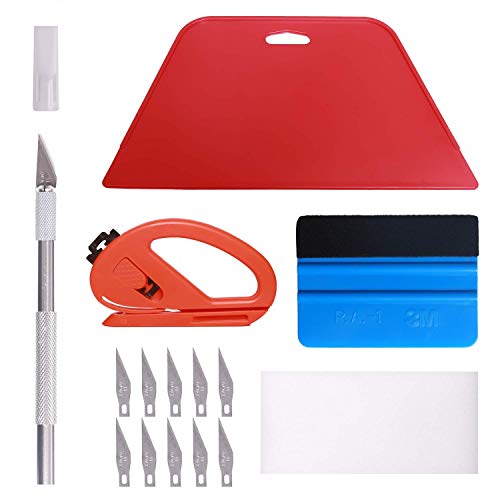
【Versatile Wallpaper Smoothing Tool Kit】This multi-function tool kit is including craft art knife with 10 replaceable blades, red and blue squeegee, vinyl cutter and sponge, which is perfect for wallpaper application, wallpaper trimming ceiling, self adhesive wallpaper, contact paper, countertop paint, ship-lap wallpaper, etc.
Gather the Essential Wallpaper Tools
How do you guarantee your vision unfolds without costly frustration? You arm yourself with the right tools before touching a single roll of peel-and-stick.
Your foundation begins with a measuring tape, sharp scissors, a pencil, and a craft knife stocked with fresh blades—you’ll need them for clean cuts and precise pattern matching. Add a level and straightedge to maintain true vertical lines and parallel edges. A smoothing tool becomes your secret weapon, pressing firmly to eliminate air bubbles and create flawless seams that disappear into the design. Don’t forget a step ladder for reaching those upper corners with confidence.
These essential tools transform potential chaos into controlled artistry. When every instrument rests within arm’s reach, you command the process rather than chase it.
Recommended Products

EASY ADJUSTMENT - E-Z Hang provides ‘slip’ allowing you to float your wallpaper into position without having to peel and re-stick, simplifying pattern matching.

EASY TO APPLY: Squeeze tube makes application simple

VERSATILE – Ideal for hanging most types and weights of wallcoverings including vinyl, solid-vinyl, non-woven, paste-the-wall, paste-the-paper, and heavyweight commercial wallcoverings.
Mark Your Starting Point With a Level Line
Why risk a crooked installation when a single level line guarantees perfection? You’ll establish your starting point by measuring from the far corner—subtract one inch to account for edge trimming—then draw a vertical guide from ceiling to floor using your level. This mark becomes your anchor for flawless wallpaper alignment.
Position yourself away from entry points or direct sightlines, concealing the seam where eyes naturally wander less. Align the right edge of your first strip precisely to this vertical guide, securing a true starting position that cascades into seamless pattern matching across the entire surface.
Verify your level line twice before committing; every subsequent strip depends on this foundation. With this single, deliberate stroke, you’ve transformed potential chaos into controlled artistry—your wall awaits its transformation.
Recommended Products

Perfect Wallpaper Kit: This kit includes a paste brush, a wallpaper smoother brush, a seam roller, a aluminum snap-off knife (with extra10pcs blades), a razor blade scraper (with extra 5pcs blades), a measuring tape, a 7.6 inch wallpaper squeegee, a 12 inch felt squeegee and 4 inch felt suqeegee to help you in hanging wall paper.

A basic but versatile tool kit help you on wallpaper application,trimming ceiling,woodwork or baseboard projects,vinyl wrap,window tint or glass film

【Set of basic tools】: Package includes craft art knife with 5 replaceable blades, red smoother, blue smoother with soft felt, retractable measuring tape, seam roller with wooden handle, vinyl cutter and double-end scraper with protective cover
Cut and Match Your Wallpaper Strips
What happens when pattern mismatches derail an entire wall? You avoid it entirely through meticulous preparation. You’ll want to create pre-cut strips measured to your wall height, adding one to two inches at each end for confident trimming.
Lay your wallpaper on a clean flat surface and unroll multiple panels simultaneously to align the design from strip to strip. You’ll match the pattern visually before making any cuts, ensuring floral motifs, geometric repeats, or textured elements flow seamlessly across your installation. Pattern matching demands patience here.
Swap your razor blade frequently—sharpness guarantees clean edges that support flawless seam alignment. As you prepare each strip, verify pattern alignment against its neighbor. You’re building continuity strip by strip, transforming separate panels into one cohesive surface. Your walls deserve this precision.
Recommended Products
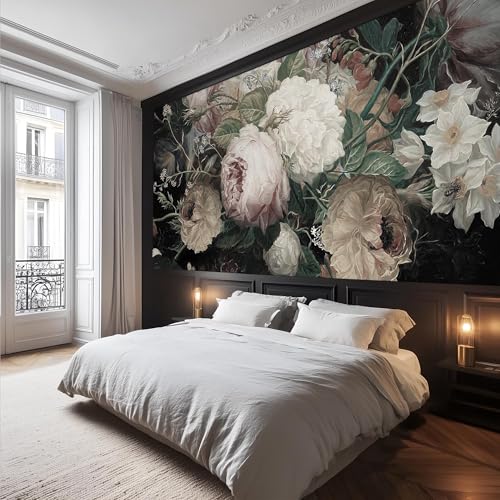
MATERIAL --This wall mural wallpaper is made of self-adhesive canvas. It is removable and repositionable

[Easy to Handle and to Install] One of the best things about the contact paper is that almost anyone can install it or attach it. Choose a table, a piece of old furniture or use it even as wallpaper. The paper is self-adhesive and with 2–3 moves its ready. Choose the size you want, cut it, and then stick it on the specific object
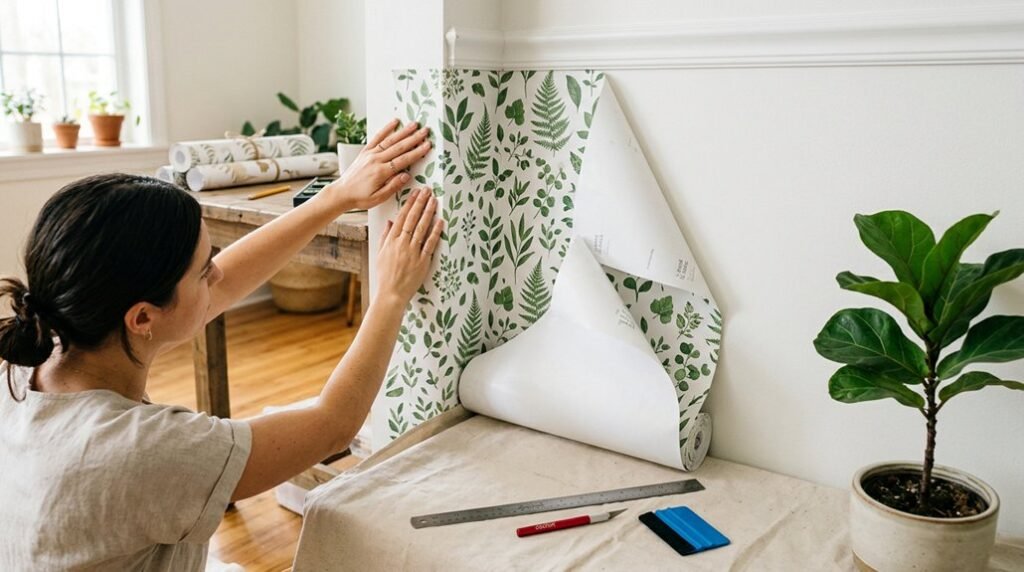
Hang the First Strip Without Stretching
Where does a flawless installation truly begin? With your first-strip placement. From the far corner, measure the wall width, subtract one inch for your starting edge trim, and mark a straight vertical guide using a level. This ensures impeccable alignment from the outset.
Align the right edge of your paper to this guide, keeping it parallel to the ceiling line before touching the wall. You’ll peel back twelve to twenty-four inches of backing, applying the top with a slight ceiling overlap so the strip seats naturally without stretching.
Work with a partner when possible—one guiding the roll while the other maintains seam alignment and prevents tension. Smooth from the center outward, checking your edge as you press downward gently. This deliberate, unhurried approach establishes the foundation for seamless results.
Smooth Bubbles and Trim Clean Edges
Once your first strip is anchored, you’ll turn your attention to the surface itself—because even the most careful placement leaves room for refinement. Begin smoothing from the center outward with a firm tool, pressing air bubbles toward the edges until the surface lies perfectly flat. If you encounter resistance, lift and re-align across a longer span rather than forcing a small section, preserving that seamless finish you’re after.
For seams, enlist a buddy to guide the roll while you smooth simultaneously—this partnership ensures edges meet flush without trapping air. When you reach baseboards or molding, switch to a sharp craft knife held perpendicular to the wall. Trimming demands steady hands and confident strokes; cut cleanly, peel away excess, and admire how precision elevates the entire installation.
Troubleshoot Wrinkles and Final Seams
Why does one stubborn crease seem to multiply into three? You catch wrinkles early by peeling back generously, adjusting over longer stretches rather than fighting small sections where tension gathers and spreads.
You maintain a steady pace, never rushing, so seams stay flush as you work from center to edges. You enlist a buddy to guide the top while you align edges, transforming a solo struggle into shared precision. Once positioned, you press firmly with a plastic smoothing tool, driving outward to banish air pockets before they linger.
You trim final edges along molding with a craft knife, clean and decisive, then re-smooth until every surface breathes perfection. Your walls reward patience: flawless seams, zero wrinkles, finish worthy of admiration.
Conclusion
You’ve got everything you need to transform your space with confidence. By prepping carefully, working methodically, and embracing the flexibility peel-and-stick offers, you’ll create walls that feel genuinely yours. Trust the process, enjoy the journey, and step back to admire a finish that proves you’re capable of beautiful, lasting results. Your refreshed room awaits—go make it happen.