You’ve stared at that bay window for weeks, unsure how to transform it from an awkward architectural feature into something polished. The angles, the light, the endless hardware options—it’s enough to stall any decision. But here’s the reality: most bay window mistakes happen before a single curtain gets hung. You need to know what you’re working with first, and that choice will shape everything that follows.
Identify Your Bay Window Type First
Before you choose curtains or furniture placement, you’ll need to figure out exactly what kind of bay window you’re working with. Most commonly, you’ll encounter the three-sided bay, which features a larger center pane flanked by two angled side windows. This bay window type dominates design magazines and showhouses. However, you shouldn’t assume all bays follow this pattern. You’ll also find box bays with rectangular central picture windows, and oriel bays that project outward without touching the ground, often supported by decorative corbels.
Don’t confuse your bay with a bow window, which curves gently using four or five equal-sized windows rather than sharp angles. Identifying your specific configuration matters because each bay window type demands different window treatments and mounting solutions. Measure carefully, note the angles, and you’ll avoid costly mistakes when dressing your unique space.
Recommended Products

Sturdy Construction: Crafted from high-quality steel 1 inch curtain rod is built to last. Its solid construction ensures stability , withstanding daily use and the test of time.
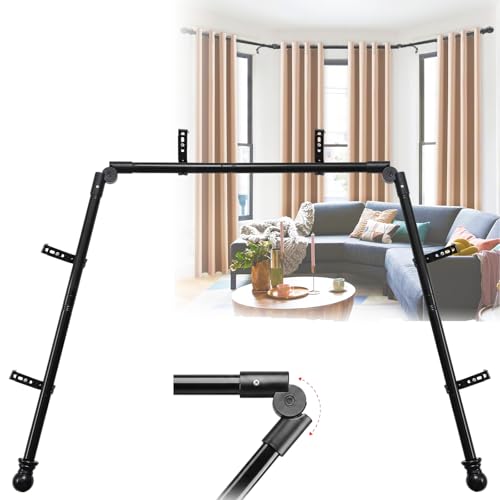
Flexible Angle Adjustment: The bay window curtain rod features a 0-180° rotatable elbow connector, perfect for handling tricky angles and uniquely shaped windows. Ideal for use in bedrooms, kitchens, bathrooms, and living rooms
Layer Light: Sheers, Shades, and Privacy Solutions
Why settle for harsh glare or total darkness when you can master the light instead? You control layered light in your bay window by pairing sheers with functional shades. Hang sheers to diffuse sunlight beautifully, then add roller, Roman, or woven wood shades for adjustable privacy solutions. You’ll choose light-filtering or blackout fabrics based on your needs.
Mount shades inside the frame to preserve your bay window’s clean silhouette, or opt for outside mounts to boost light control across angled panes. Measure widths at top, middle, and bottom, then align headrails precisely to eliminate gaps. Layer sheer panels over coordinating shades beneath—you’ll maintain daylight while securing complete privacy. This strategic pairing transforms your space with balanced, flexible illumination.
Recommended Products

PRIVACY + LIGHT FILTERING (NOT BLACKOUT) – Softens sunlight and provides daytime privacy. At night with interior lights on, silhouettes may be visible (common for light-filtering shades).

Strong Support: The window shade brackets can easily fix the pulley track, ensuring the normal operation of the roller blind and preventing effectively the roller blind from falling off or loosening.
PRIVACY + LIGHT FILTERING (NOT BLACKOUT) – Softens sunlight and provides daytime privacy. At night with interior lights on, silhouettes may be visible (common for light-filtering shades).
Pick Bay Window Drapery, Shades, or Blinds
Layering light sets the foundation, but your choice of window treatment defines the room’s character. When dressing your bay window, you’ll select from shades, blinds, or drapery based on function and style.
Choose inside mounts for a streamlined appearance that preserves architectural detail, or opt for outside mounts to conceal the full frame and accommodate angled bay profiles.
Roller, Roman, woven wood, and cellular shades offer versatile light control from filtering to blackout. Wood or metal blinds provide adjustable slats for precise privacy management.
Measure three width points and three length points for inside mounts; for outside mounts, measure your desired coverage area. Pay careful attention to headrail alignment across adjacent windows—this ensures your window treatments operate smoothly without gaps or obstruction throughout the entire bay configuration.
Recommended Products
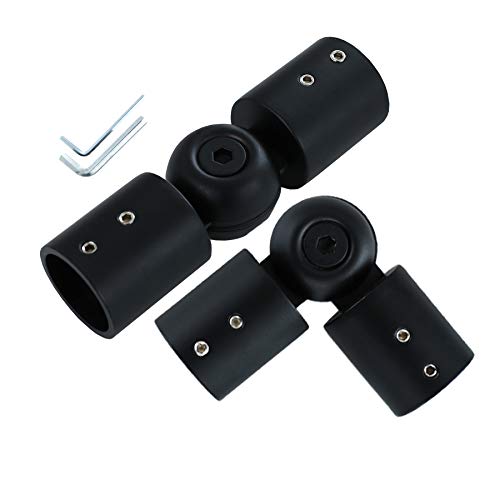
Flexible and Adjustable: Angle adjustment to meet your needs, from 90 degrees to 180 degrees.The screw in the middle is for fixing the corner connector, and the 2 screws on both sides are for fixing the curtain rod, firm and strong. The hole connecting curtain rod is wrapped with smooth angle, which makes it more fit and beautiful.

Flexible and Adjustable: Angle adjustment to meet your needs, from 90 degrees to 180 degrees.The screw in the middle is for fixing the corner connector, and the 2 screws on both sides are for fixing the curtain rod, firm and strong. The hole connecting curtain rod is wrapped with smooth angle, which makes it more fit and beautiful.

Flexible and Adjustable: Angle adjustment to meet your needs, from 90 degrees to 180 degrees.The screw in the middle is for fixing the corner connector, and the 2 screws on both sides are for fixing the curtain rod, firm and strong. The hole connecting curtain rod is wrapped with smooth angle, which makes it more fit and beautiful.
Choose Rods, Tracks, and Mounting Hardware
How do you guarantee your bay window treatments move seamlessly across every angle? You’ll need bay window rods or a track system designed for angled configurations. First, decide between inside mount and outside mount options. Inside mount installations demand roughly ¾ inch depth and precise leveling across all sub-windows to prevent headrail interference. Outside mount placements attach to walls or ceilings, offering flexibility without depth constraints while visually expanding your opening.
For multiple sections, choose continuous rods or individual treatments with consistent projection and spacing. Exterior-facing positions let curtains extend past frames, improving privacy and light control. When selecting mounting hardware, match finishes—brushed nickel, matte black, or wood-tone—to existing trim for cohesion. Your hardware choices directly impact both function and aesthetic flow.
Recommended Products

Package Included: SpaceDresser sheer curtains are made of High-Quality polyester fabric, soft to touch. Each pack includes 2 sheer panels of 52" wide x 84" length.
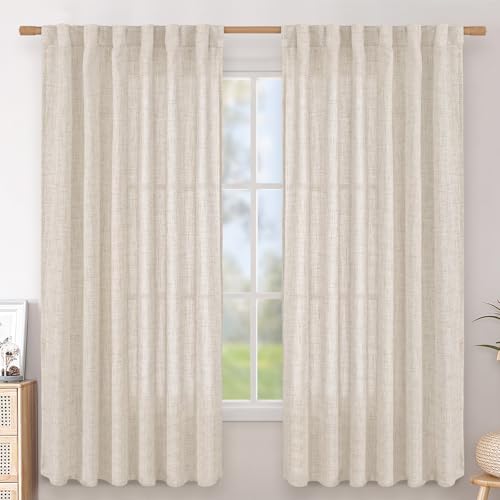
PACKAGE INCLUDES: Set of 2 faux linen curtains. Each panel measures 52 Inch wide by 63 Inch long, with 7 back tabs and 3" rod pocket fits most standard rods and makes the maximize coverage of windows.
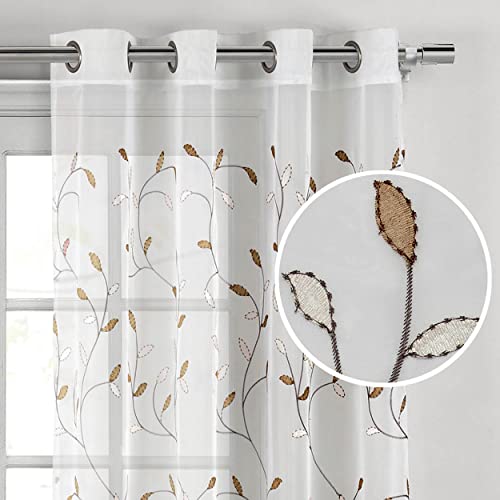
Window Elements Collection - Elevate your home's decor with the wavey leaf embroidered curtain panels by Window Elements. Add a touch of elegance to your bedroom, living room, kitchen, or sunroom with our sheer decorative curtains.
Measure Your Bay Window (Without the Headache)
Where exactly do you start when every angle of your bay window demands a different number? You grab your steel tape and tackle bay window measurements systematically.
For inside mount, you’ll record width at the top, middle, and bottom—then length at left, middle, and right. Use the smallest width and largest length when ordering. For outside mount, measure the full coverage area you want, centering your treatment with equal width on both sides.
You’ll also manage headrail alignment carefully when treating each pane separately, preventing contact or gaps between units. Always follow your product’s exact measurement instructions, as tolerances vary by shade type. Recheck every number before ordering. Precision ensures proper fit, smooth operation, and polished aesthetics within your bay window profile.
Fix These 5 Measurement and Light-Control Problems
Why do perfectly measured blinds still leak light or jam against each other? You’re likely missing critical measurement tips for your bay window. For inside-mount treatments, verify you’ve got at least ¾ inch of frame depth first. Then measure width at top, middle, and bottom; measure length at left, middle, and right. Order using the smallest width and largest length—anything else invites gaps or poor fit.
For outside-mount solutions, center your shade evenly beyond the frame to eliminate light leaks. You’ll also need to align headrails across adjacent bays so they don’t touch. Finally, don’t rely on single treatments. Layer sheers with shades or pair Roman and roller shades together. This layering transforms your light control and privacy without sacrificing style.
Style Treatments With Window Seats and Finishing Touches
Once you’ve solved the technical headaches of measuring and mounting, you’re ready to turn your bay window into a true retreat. You’ll maximize comfort by incorporating a window seat with cushions and storage underneath, creating a functional focal point within your treatments for bay windows.
Plan your drapery panels and Roman shades to accommodate three-sided or bow configurations, ensuring panels stack neatly without blocking your seating area. You’ll layer Roman shades with sheers to maintain daylight and privacy around your niche. Draw floor-length curtain panels to the sides to frame the window seat without covering its depth. Finally, coordinate fabrics, colors, and textures between your window seat upholstery and drapery to create a cohesive look that complements your room’s decor.
See Samples in Person at a Local Showroom
How do you know which fabric catches the light just right or whether that Roman shade operates as smoothly as promised? You visit a showroom and experience window treatments samples firsthand.
At your local showroom, you’ll explore interactive displays built specifically for bay window configurations. You’ll browse over 1,200 fabric swatches, comparing colors, textures, and how each material responds to natural light in real time.
Design consultants stand ready to guide you through inside versus outside mounting options and demonstrate shade operations on three-sided bay window displays. You’ll see drapery pleat styles—pinch pleat, ripple fold, goblet—and evaluate Roman, roller, and woven shades against your room’s lighting and aesthetic.
Nothing replaces seeing, touching, and operating treatments yourself before committing to your bay window investment.
Conclusion
You’ve got everything you need to transform your bay window into a stunning focal point. Start by identifying your window type, then layer light with sheers and shades that suit your space. Measure carefully, choose hardware that fits your style, and don’t forget those finishing touches. Now grab your tape measure and get started—your perfect bay window awaits!