You stand before your built-in shelves, wondering where to even begin. Empty them completely—every book, every frame, every dusty souvenir—and you’ll finally see what you’re working with. The blank space reveals possibilities you hadn’t noticed, but it also exposes the real challenge ahead. What you choose to put back, and what you leave out, will make or break the entire look. The first decision you make sets everything in motion.
Empty Your Built-In Shelves and Start Fresh
Where do you begin when your built-in shelves feel tired and cluttered? You strip them bare. You pull everything off, creating empty shelves that transform chaos into possibility. This bold move gives you a fresh start and a clean slate for reimagining your space.
You stand back and assess that blank canvas. You take a before photo, then build your vision from zero. You examine each item, deciding what deserves a spot in your new arrangement. You release clutter that’s collected dust, revealing vertical and horizontal space you forgot existed.
You plan cohesive groupings as you picture where each piece belongs. You’re envisioning focal points and spacing. You’re crafting visual balance from the ground up, and that mental inventory helps you build something intentional, harmonious, and entirely yours.
Recommended Products

[HAIR STYLING TOOLS STORAGE]- Black and gold wall mount hair dyer organizer consists of 3 compartments space and display shelf for storing hair dryer, straightener, flat iron, curling iron, other hair hot tools, brushes, combs, essential oils and more

❤MATERIAL:This womens camisole with shelf bra is made up of high-quality fabric, primarily consisting of 95% cotton and 5% spandex. This fabric has properties of softness, comfort, breathability, and moisture absorption, allowing women to experience excellent comfort and warmth when wearing it.

STYLISH STORAGE: Keep bathroom clutter under control by keeping bath and beauty products organized; Perfect for extra supplies of bathroom basics - toothpaste, extra toothbrushes, hairspray, soap, makeup wipes, facial cleansing wipes, sheet masks, lotions, nail polish remover, cotton swabs, cotton balls, facial tissues, bath bombs, foam makeup wedges, and other toiletries; Use on bathroom counter tops or under the sink and inside cabinets for more discreet storage; Set of 2
Anchor With Heavy, Eye-Catching Pieces First
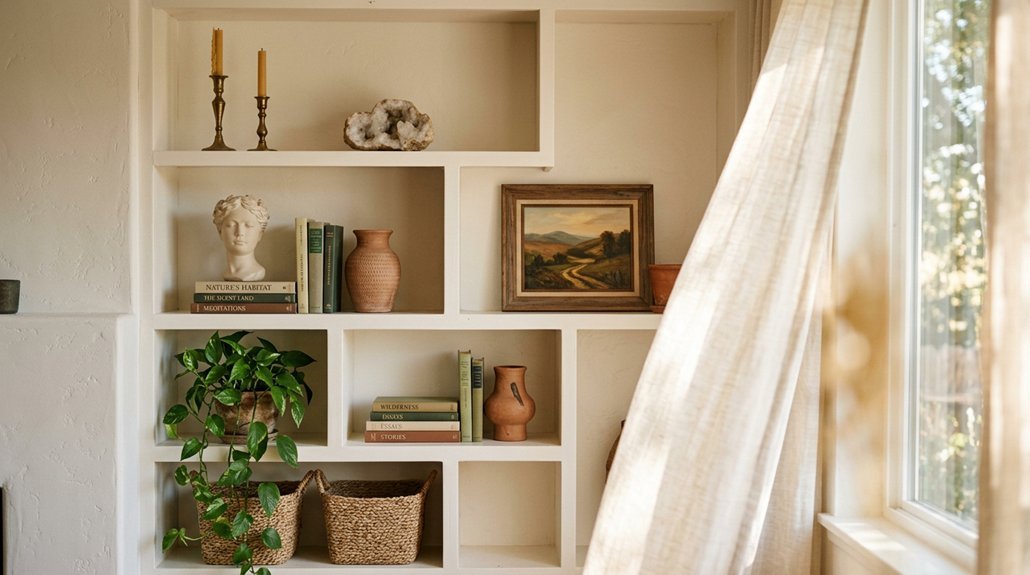
How do you keep a shelf from feeling scattered and unfocused? You anchor it with your largest items first. Grab that substantial vase, bold sculpture, or oversized framed art and create an immediate focal point. You’ll want to place these heavy pieces off-center on lower shelves to ground your arrangement and avoid a top-heavy look.
Pair your substantial anchor with vertical elements like tall books or tams to boost its visual weight and establish balance. Use this heavy piece as a guide for surrounding objects, ensuring smaller items relate through size, color, and texture. Don’t crowd multiple heavy items together—stagger them across shelves to maintain rhythm and breathing room throughout your display.
Recommended Products
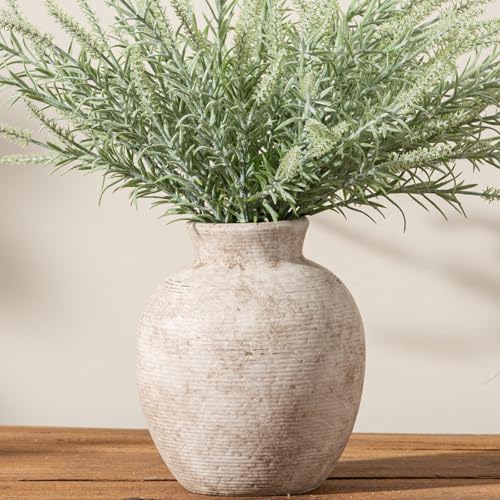
【Perfect Size】Measuring 6.3 inches wide and 7.4 inches high, ideal for both fresh and artificial flowers.

[ Heavy Duty & High Quality Ceramic ] The rustic farmhouse vase is handcrafted from 100% ceramic, heavy duty and durable(3.3 Pounds), over 1380℃ high temperature firing craft, it will ensure it is sturdy and never be aging. Also,we attached an exquisite vase mat in the vase if you need to put it on delicate and weak surface.
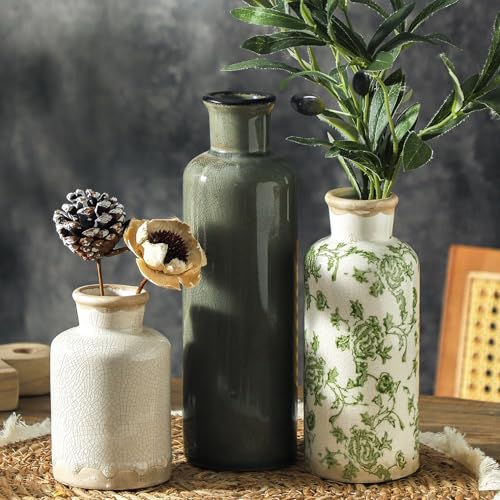
【Vintage Ceramic Vases】More than vases, they are wonderful home decor. This set of ceramic vases is perfect for artificial flowers or fresh flowers and plants, can be placed individually or in combination, as a room decor, home decor, living room decor, farmhouse decor, table decor, bookshelf decor,entryway decor, kitchen decor, boho decor, house decor, office decor,shelf decor and more.
Stack Books and Layer In Personal Objects
Why settle for a shelf that looks like a library display? You’ve already anchored with heavy pieces, so now you’ll stack books to build dynamic structure. Start at the bottom shelf—stack books horizontally to ground the display, then lay some flat as risers to create tiered levels. You’ll vary heights by alternating orientations: face-out, spine-out, and stacked arrangements. This prevents flat uniformity and introduces natural movement.
Once you’ve established your book foundation, weave in personal objects. Slide framed photos between stacks, nestle collected souvenirs atop horizontal piles, and tuck small vases into gaps you’ve intentionally left. You’re mixing hardcover and paperback finishes for subtle texture contrast. This shelf styling approach—combining functional books with meaningful mementos—transforms built-ins from storage into storytelling.
Recommended Products

Designer Aesthetic & Realistic Texture: Elevate your space with these upgraded decorative books wrapped in premium faux linen. Featuring textured page edges and gold foil "Van Gogh" stamping, they look exactly like real hardcover art books that blend seamlessly with your collection—guests won't even notice they are faux boxes. Perfect faux books for coffee table styling or adding a modern farmhouse touch to any room. No assembly is required—they arrive ready to style right out of the box.

Curated 3-Piece Designer Aesthetic Set:Elevate your space instantly with this all-in-one styling collection. Includes 2 upgraded decorative books wrapped in premium real linen fabric and 1 handcrafted natural wood bead garland with rustic tassels. Featuring realistic textured page edges and exquisite gold foil-stamped artistic titles, these fake books look exactly like real hardcovers that blend seamlessly into your collection—offering a cohesive, magazine-inspired look right out of the box.

Curated 3-Piece Designer Aesthetic Set:Elevate your space instantly with this all-in-one styling collection. Includes 2 upgraded decorative books wrapped in premium real linen fabric and 1 handcrafted natural wood bead garland with rustic tassels. Featuring realistic textured page edges and exquisite gold foil-stamped artistic titles, these fake books look exactly like real hardcovers that blend seamlessly into your collection—offering a cohesive, magazine-inspired look right out of the box.
Create Movement With Color Repeats and Texture Mixes
Once you’ve anchored your shelves with books and personal objects, you’ll want to pull the eye through the entire display using diagonal color repeats that zigzag across levels—placing a rust ceramic on the lower left, then echoing that tone with a similarly hued frame on the middle right, and completing the movement with a leather-bound book on the upper left. These color repeats create visual movement that guides attention naturally through your arrangement.
Layer your texture mix by pairing matte ceramics with glossy metals and weaving soft baskets between hard surfaces. You’ll add tactile depth without overwhelming the eye. Anchor your palette with neutral bases—taupe, white, or black—then punctuate with saturated accents. Plan repeats across sizes and materials, like matching brass vases to amber book spines, reinforcing unity while keeping variety alive.
Recommended Products

CHOOSE YOUR PERFECT STAND: - 3-inch small decorative plate stand fits for item of 3″ ~ 9″ Height / Diameter, Lip Depth: 1". 6-inch picture holder stand fits for item of 7″ ~ 15″ Height / Diameter, Lip Depth: 1-1/4".
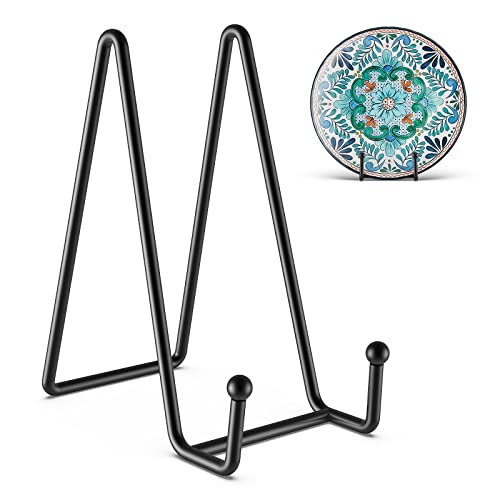
[What you get]: 3 * 6-inch plate holder, it fits the item which the height/diameter from 7" to 15" and lip depth 1.6". Included purse, dish, bible, cookbook, magazine, etc. These book display stand is designed and produced under strict quality standards. we promise to provide the BEST PRODUCT and CUSTOMER SERVICE for you.
When to Stop: Edit Built-In Shelves Before They Feel Done
Where do you draw the line between styled and overstuffed? Step back before you think you’re finished. Start by emptying your shelves completely—you’ll spot negative space opportunities you’d otherwise miss.
Effective shelf styling demands restraint. Group items by size, mixing large focal pieces with smaller accents to establish visual weight without chaos. Leave some shelves partially bare; negative space prevents that cluttered, junky feel you’re trying to avoid.
Stagger heights and scatter similar pieces across the unit to create rhythm. Cluster small items on trays, layer art before books, and balance weight and color through intentional pairing.
When you’re tempted to add one more object, stop. Edit one piece out instead. Your built-ins will breathe better for it.
Recommended Products

DISTINCTIVE FLUTED DESIGN: This set of 3 grooved LED pillar candles (4”, 5”, and 6” tall, each 3” wide) features an elegant ribbed texture in Loden Green — a rich sage / olive / moss tone that complements both modern and rustic decor. These sculpted flameless candles evoke the charm of classic carved wax columns, adding a touch of sophistication to any setting—without the fire risks
Conclusion
You’ve emptied, anchored, layered, and edited your built-in shelves with intention. Trust your eye—when color flows, textures converse, and negative space breathes, you’re finished. Step back, live with the arrangement, and tweak only what feels off. Great shelf styling isn’t about perfection; it’s about balance that reflects you. Now enjoy the shelves you’ve built into something personal.