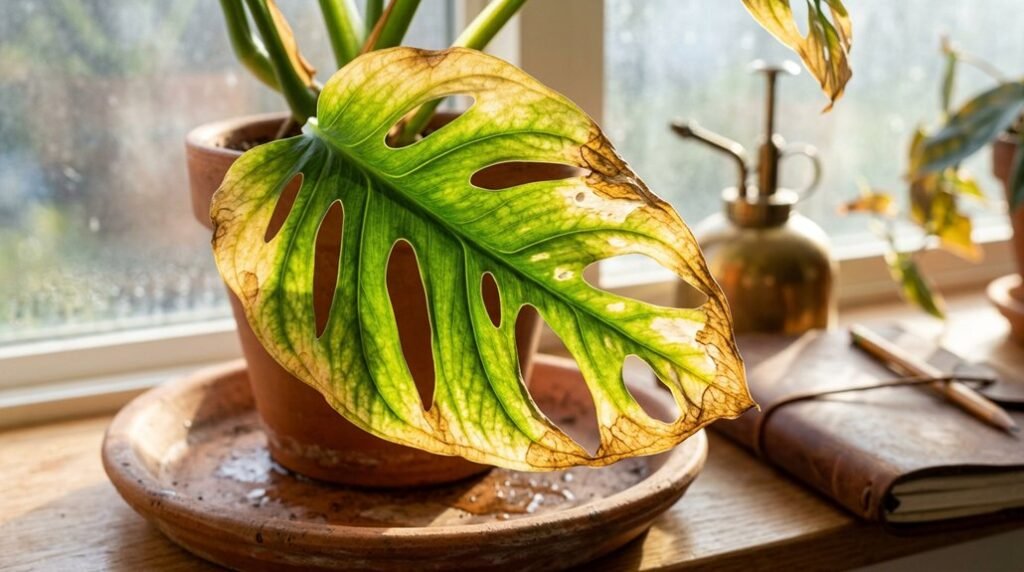
You notice yellow creeping across your plant’s leaves, and you’re right to pause. It’s rarely just one culprit—water, roots, or chemistry could each be staging a quiet rebellion. Before you reach for fertilizer or panic-prune, you’ll need to investigate in a specific order. The real answer might surprise you, and catching it early makes all the difference.
Diagnose Watering Issues First
Why do those vibrant green leaves suddenly look so sickly? You’re likely facing watering troubles, and you’ll need to distinguish between overwatering and underwatering to save your plant.
When you’re overwatering, you’re drowning the roots. Waterlogged soil suffocates them, cutting off air and stopping nutrient delivery—those yellow leaves prove it. But don’t swing too far the other way; underwatering dries the soil so completely that roots can’t absorb nutrients either, producing identical symptoms.
You’ll solve this by testing soil moisture first. Stick your finger in—if the top inch feels dry, water thoroughly. If it’s damp, wait. Always check that your pot’s drainage holes let excess escape, preventing deadly moisture buildup. Get this balance right, and you’ll restore your plant’s health quickly.
Recommended Products

🛠️ RESCUE ROOTS FROM ROT, SHOCK & OVERWATERING Brown, mushy roots? Yellowing leaves? Soggy soil that never seems to dry? These are classic signs of root rot, transplant shock, or overwatering stress. Our Root Rot Repair formula targets the underlying damage, helping your plant recover quickly and rebuild stronger roots from the ground up.


Miracle-Gro Indoor Plant Food for Tropicals contains nutrients for lush, green foliage in indoor tropical plants
Check Roots and Drainage for Hidden Problems
Your watering adjustments mightn’t take effect immediately—sometimes the real damage hides beneath the surface. Gently remove your plant and inspect the root ball. Healthy roots appear whitish-yellow, while dark, mushy roots with a foul odor signal decay that causes yellow leaves and poor root health. Check for compaction or breakage that blocks water and nutrient delivery.
Improve drainage in waterlogged or compacted soil by adding amendments like gypsum for clay soils or similar products to restore structure. Ensure your pots have drainage holes and use well-draining soil to prevent suffocation.
If you find rotten roots, you’ll likely need to replace the plant. For compacted roots, prune damaged portions and repot in a larger container with quality potting mix. Addressing these hidden issues directly restores root health and stops yellow leaves from spreading.
Recommended Products

Accurate Soil Moisture Detection: The XLUX Soil Moisture Meter can tell you if the soil deep inside your pot or garden is dry, moist or wet; whereas your eyes and fingers can only determine the moisture level of the soil surface. The probe is 5.5 inches (14 cm) longer than regular styles, allowing it to measure the soil moisture at the bottom of larger and deeper flower pots.

Kindly NOTE: This soil tester can not be applied to test pH value of any other liquid. If the soil is too dry the indicator will not move, and water it before testing.

【4 in 1 function】This is a 4-in-1 multifunctional soil tester.Our soil tester fastly to measure soil moisture, pH, temperature and sunlight to help you take better care of flowers and plants.You can know when you need to water your soil by measuring moisture and pH & Temperature value of the soil and sunlight level of plants with it.
Test Soil pH When Watering and Roots Check Out
Once you’ve ruled out root rot and drainage issues, it’s time to look at your soil’s chemistry. Grab a soil test kit from your local garden center or extension office. You’ll discover your pH level and unlock the mystery behind your plant’s yellowing leaves.
Most plants thrive when pH sits between 6.0 and 7.0. Acid-loving varieties prefer 4.5 to 6.0. When pH strays outside your plant’s comfort zone, nutrient availability plummets—even when nutrients abound, your roots can’t absorb them. Weak roots compound this problem, so ensure they’re healthy before amending.
If your soil test reveals imbalance, apply lime to raise pH or sulfur to lower it. Retest after several weeks. Before watering again, verify moisture levels and consider pH-adjusted irrigation to maximize nutrient uptake.
Recommended Products

[Garden Root Pick Tool] It is a single claw root pick that is convenient for replanting, repotting, transplanting plants. You can remove the soil from the roots gently with this single claw garden tool. It is an essential repotting tool for bonsai.

Ross Root Feeder's easy to use system stops pollution from fertilizer run-off and costly waste of water from evaporation
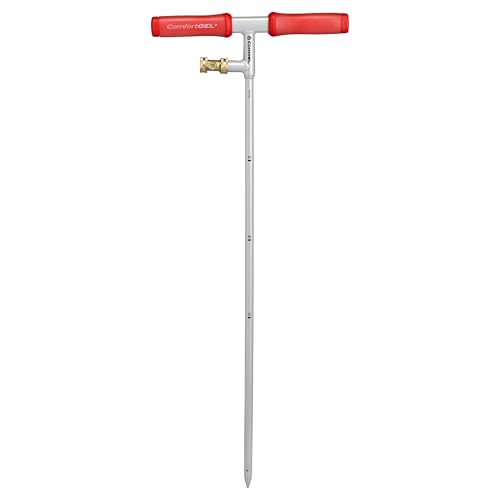
Targeted Deep Root Irrigation – Delivers water directly to the root zone, reducing runoff and evaporation while promoting deeper, healthier root growth for trees, shrubs, and garden plants.
Spot Nutrient Deficiencies After Ruling Out Environment
How exactly do you pinpoint the culprit when your plant’s environment checks out but the yellowing persists? You’ll need to read the leaves like a diagnostic map. Nitrogen deficiency strikes older leaves first, washing them uniformly pale while the plant cannibalizes its stored resources. Iron deficiency betrays itself through interveinal yellowing on fresh growth, leaving veins starkly green against bleached tissue. Magnesium deficiency creates mottled yellow patches between veins on aging foliage, preserving green vascular lines. These distinct signatures let you target your response precisely.
Skip the guesswork and run a soil test to confirm what your observations suggest. You’ll identify exactly which nutrients lag behind, then select amendments that restore balance without wasting money on unnecessary supplements.
Recommended Products

Accurate Soil pH Testing: Dewildetradingco Soil pH Test Strips offer measurements of soil pH levels (pH 3.5-9). As an essential tool for every gardener and grower, these test strips help determine the optimal pH for various plants, such as outdoor plants, indoor plants, gardens, grass lawns, fruit trees, flowers, vegetables, and forest shrubs.
Quick, at home results for Soil pH, Nitrogen, Phosphorous and Potash Innovative and inexpensive soil test kit features an easy-to-use capsule system and patented color comparators

✅ 1Dial & 1 LCD Screen - Replace/install all 3 batteries each time. Put button to %RH/°F to - Turn On, and put to LIGHT to - Turn Off. Read the LCD results in 3-5 mins. (Not Water Moisture Meter, so, please don't test liquid)
Tell Natural Aging From True Yellow Leaf Problems
Where exactly should you look first when deciding if yellowing spells trouble or simply signals the passage of time? You should examine the lower, older foliage. Aging leaves typically turn yellow at the bottom first, while new growth stays vibrant green. This bottom-up pattern helps you distinguish problem vs aging quickly.
When you’re assessing yellow leaves, check if shaded lower leaves are the ones changing color. In mature growth, plants naturally shed older foliage to redirect resources toward fresh shoots. You’ll notice replacement growth emerging as the old drops—this confirms it’s normal life cycle, not crisis.
Problem vs aging becomes clear through pattern recognition. True problems show irregular yellowing or affect new tips. Aging leaves follow predictable, orderly progression. Trust this distinction and you’ll avoid unnecessary panic when your plant simply matures.
Recommended Products

All-In-One Potting Soil Solution: TOYPOPOR potting soil is a blend designed to give your plants everything they need to thrive. This organic potting soil is packed with perlite, sphagnum peat moss, coco coir and rice husk charcoal. Great for all indoor outdoor plants.
Conclusion
Start by checking your watering habits, since too much or too little water usually causes yellowing. If that’s not the issue, inspect your roots and drainage next. Still stumped? Test your soil pH and look for nutrient deficiencies. Remember, some older leaves naturally yellow with age. Once you’ve ruled that out, you’ll pinpoint the real culprit and get your plant back to vibrant green.